Container Gardening Facts And Trends – Backyard Homesteader Series
If your garden spot has poor or rocky soil, consider growing in containers. Just about anything that is grown in a traditional garden can be grown as well, or even better in containers. And there are many container options to fit everyone’s style and budget.
Container Gardening is a popular trend that provides unique and attractive alternatives to today’s gardener. A container garden is capable of growing almost any vegetable or fruit, and the variety of containers is limited only by the Gardener’s imagination.
Gardening in containers generally requires less work, less water, and less pest management, but can produce excellent results in a small space. And, is a wonderful way to introduce children to the rewarding life of a gardener.
This Table is adapted from Texas A&M Extension. It shows the number of plants that should be planted in relation to container volume.
| Vegetable | Container size/Plant capacity | Varieties |
| Broccoli | 2-Gallons – 1 Plant | Packman, Bonanza, Others- |
| Carrot | 1-Gallon – 2 to 3 Plants | Scarlet Nantes, Gold Nugget, Others- |
| Cucumber | 1-Gallon – 1 Plant | Burpless (my fav), Liberty, Others- |
| Eggplant | 5-Gallons – 1 Plant | Florida Market, Black Beauty Others- |
| Green Bean | 2-Gallons Minimum – 3″ Apart | Top Crop, Blue Lake, Others- |
| Green Onion | 1-Gallon – 3 to 5 plants | Crystal Wax, Evergreen Bunching, Others- |
| Leaf Lettuce | 1-Gallon – 2 Plants | Buttercrunch, Romaine, Others- |
| Squash | 5-Gallons – 1 Plant | Gold Neck, Straight Neck, Others- |
| Tomato | 5-Gallons – 1 Plant | Patio, Celebrity Others- |
| Turnip | 2-Gallons – 2 Plants | Any Variety |
| Zucchini | 5-Gallons – 1 Plant | Fordhook, Black Beauty Others- |
Those are just a few of the varieties of vegetables that can be grown in containers. Actually, I can’t think of any vegetable that would not do well in a container.
Types Of Containers
The style of vessel you can use for a container garden is limited only by your imagination. I’ve seen just about anything that will hold potting soil used for both flower and vegetable container gardens.
There are gardens made with buckets, pots, tubs, totes, bags, and on and on. They can be square, round, rectangle, oval, or triangular. Anything goes! What I said earlier was true. If you can fill it with a growing medium, you can plant in it.
Here are some really cool examples of containers used for gardening:
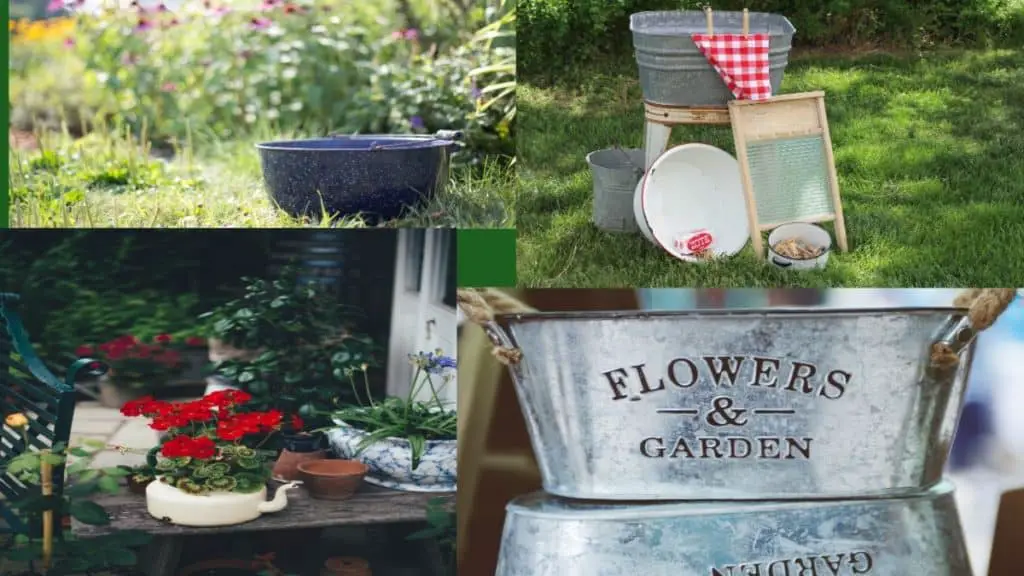
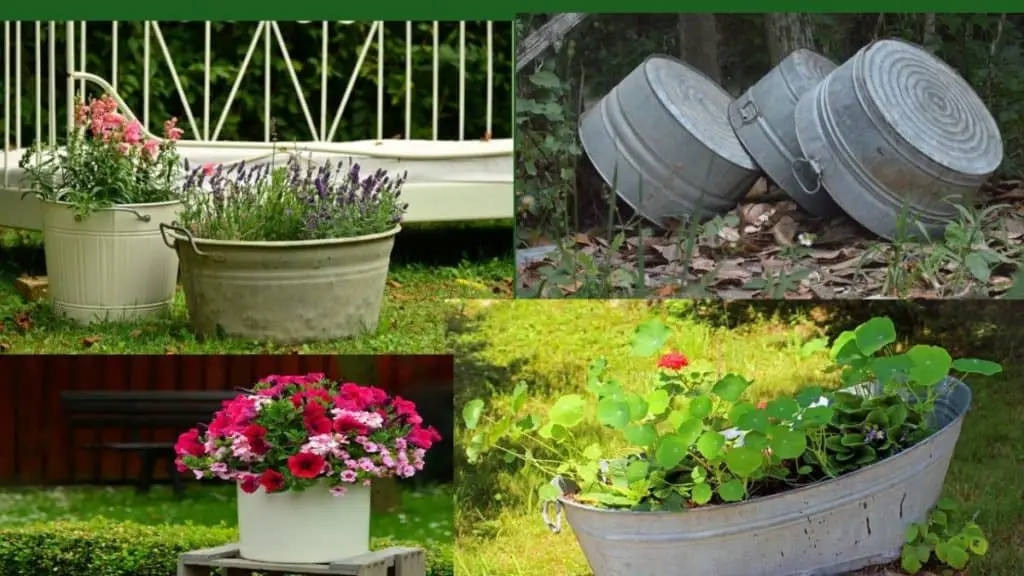
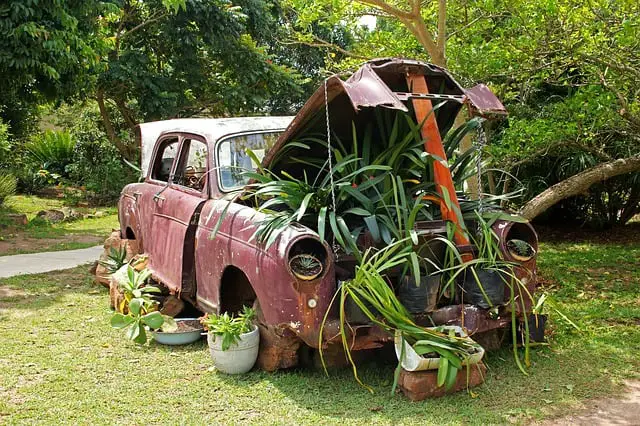
OK, that last one is a little extreme, even for me! But you get the idea. Just about any container becomes a possible garden.
Most of those container pictures above were planted with flowers, so what about vegetables? Well, veggies will do well in all those containers! There are a few that will need special attention, like a trellis for climbing vegetables, but we’ll talk about that later.

Most are familiar with using the standard pots for gardening. Terra Cotta pots are a favorite for sure. We have various kinds of containers on our deck filled with small things like succulents, flowers, and herbs. But you can also have success in containers with large plants like tomatoes or peppers.
As shown in the above chart, vegetables that will become large plants simply require larger containers. And whatever size the plant will become at maturity will determine how many individual plants can go into a certain container, and how closely-spaced they can be planted.
It is helpful to know the capacity of the container you want to use. Everyone is familiar with the standard 5-gallon bucket. Those are the ones you see at the big box stores. They are usually red or orange. Those buckets have a 5-gallon capacity for your soil medium.
However, the tops of those buckets are fairly narrow in relation to their capacity. They are deeper than they are wide. One of the 5-gallon buckets I have measures 12” in diameter at the top but it’s 14” tall.
The fact that it’s 14” tall means there will be lots of room for root growth, but the small diameter at the top of the bucket (the surface area of the potting medium) is only 12”. That means if a certain vegetable should be planted 12” apart, even if its not going to get large, you could only plant one of them in a tall, but deep bucket.
Although it is perfectly acceptable to plant larger plants like tomatoes and peppers in something like a 5-gallon bucket, a better idea for smaller plants might be to pick a container that has more surface area, but less depth.
So, try to choose a container that has a larger surface area, but still has some depth to it. Like maybe 8 to 10 inches deep. Try to imagine a bathtub. Lots of surface area, but not as much depth. Something like that would be perfect for a container garden.
But it doesn’t have to be something as big as a bathtub. I’ve used some fiberglass tubs for my gardens that were only around 6” deep, but the dimensions were around 20” X 40”. Here’s what they look like:

And here’s what they look like when they are full of Southern Peas!
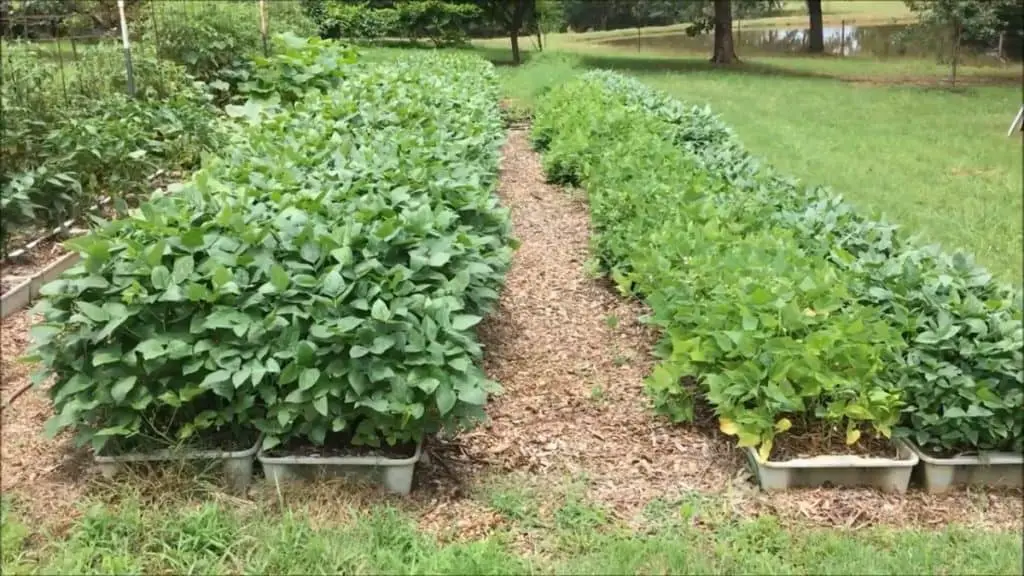
Now THAT is an amazing container garden of peas. These were Purple Hull and were about 3 feet tall. So yes, container gardening really works!
Full disclosure: Because these tubs are so shallow (about 6″) I cut part of the bottoms out of them to give roots the ability to grow deeper if they needed to.
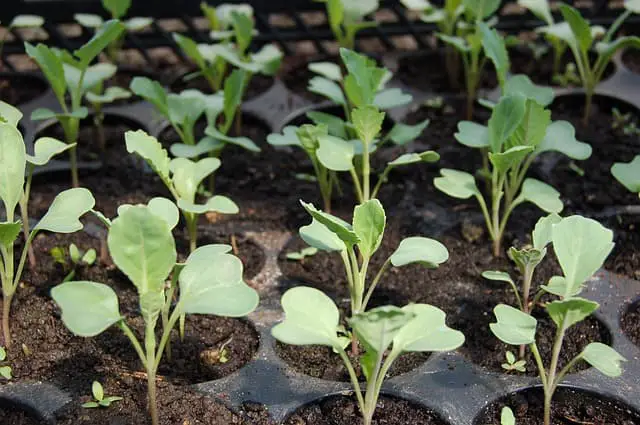
Types Of Vegetables For Containers
Tomatoes, Peppers, Squash, and a lot of other “large” vegetable plants will all benefit from being grown in containers, provided they are allowed the room they need.
As you can see above, peas will do well in containers, so will beans, and even corn. You can’t plant corn seeds very close because they need a lot of room, but I’ve seen some amazing corn grown in containers.
So really, just about anything that can be grown in a standard garden can be grown in containers. You just have to take into account the growth habits of the vegetable you are considering.
The Correct Planting Medium
Many people make their own soil mixture, And typically the ratio is two parts potting mix to one part compost. There are many varieties of potting mixes on the market, but “brand” is not one of the more crucial things you need to be concerned about. Just choose a good potting mix. Not potting soil, but potting MIX.
Potting soil is going to be too dense. It will pack too tightly around the roots, and it’s just not a good medium to use in container gardens. Potting mix, on the other hand, is very light and pliable and is just what the vegetables in your container garden will need. The potting mix usually has a lot of peat in it, along with other composted materials, and vermiculite or perlite.
The vermiculite and perlite look like little styrofoam BB’s. They soak up a lot of water. They help keep your container from going dry too quickly.
Miracle Grow makes a great potting mix. It’s a little more expensive, but if you are only doing a few containers that might be a good choice for you. Another type of mix on the market is called a “seed starting mix”. That is very, very loose and light but it’s also more expensive and is not needed here.
Just stay with a good potting mix, and add in about 1/3 compost by volume. A good rule of thumb is, one shovel full of compost to two shovels of potting mix. Mix them together well in a wheelbarrow or tub, then add them to the container you will be planting in.
But don’t fill the container completely to the top. We will be layering a few more things on top to finish it off. Leave a few inches of headroom.
The Covering
When you have filled (not quite full) your container with the potting mix and compost mixture, you will want to cover it with compost and mulch. You can do this before or after you plant, but put a nice layer of compost on top of the entire container.
When you do get ready to plant, all you will do is move the top-dressing off to the side with your fingers, and plant the seedling (or seeds). Then just cover with the potting mix after you are through planting, and return the compost covering back over everything.
Yes, you have compost in the container mix growing medium, but a layer on top will just add to the fertilization of the container. You’d be surprised what a layer of compost will do for your vegetables. They love it and will reward you for your kindness.
If you don’t make your own compost, in your own compost pile, you can buy compost in bags. It’s usually not that expensive. And, since we’re adding it to our containers, it will go a lot further than if we were spreading it over an entire garden.
Some bagged compost will be composted cow manure, composted horse manure, or perhaps even composted cottonseed hulls. I like using the manure composts if I can find them readily.
I usually make sure the compost is 1/2 to 1 inch thick. This thick layer of compost will give you some weed-blocking properties, as well as much needed moisture retention and fertilization.
Don’t skimp on this. Find some good compost and top-dress all your containers with it. You will be glad you did.
Then it’s time to mulch the container. I like to use wood chips for my mulch, but you can use Pine Bark, or other bagged mulching products. Straw would be good too. Hay is good, but you would need to make sure there are no weed seeds in it.
Most hay has more than just good grass in it. When they bale it, they bale everything that is growing out in the field. That means you might have a lot of weed seeds too. Weed seeds become full-grown weeds later. You don’t want that.
One of the reasons you’ve come to Container Gardening is to try to rid your life of weeds, so don’t introduce them to your garden on purpose. Some weeds will find their own way into your garden anyway but don’t take the chance of bringing them willingly. Avoid using hay as mulch unless you know it’s clean of weed seeds. Believe me, I’ve learned this the hard way.
Get High!
There are many things that can be planted in containers, both floral and food crops, that have vining traits. What are “vining crops”? Well, they are veggies that will grow tall if they have a structure to climb on. Things like Pole Beans, Cucumbers, Melons will try to grab on to something and pull themselves up. They will benefit greatly from a trellis of some sort, and some can really grow tall.
A trellis can just be as simple as a “Tee-Pee” type structure made from 3 poles, or as complicated as a fence held up by posts. Again, you’re only limited here by your ingenuity and the aesthetics you want for your garden.
Personally, I use something I designed, that I call “Grow Arches”. They are made from a Cattle Panel, bowed to form an upside-down ”U” that forms an arch-like structure. Vining plants will “grab” on to the panels and climb like crazy.
Here are a couple of pictures of my “Grow Arches” in action:
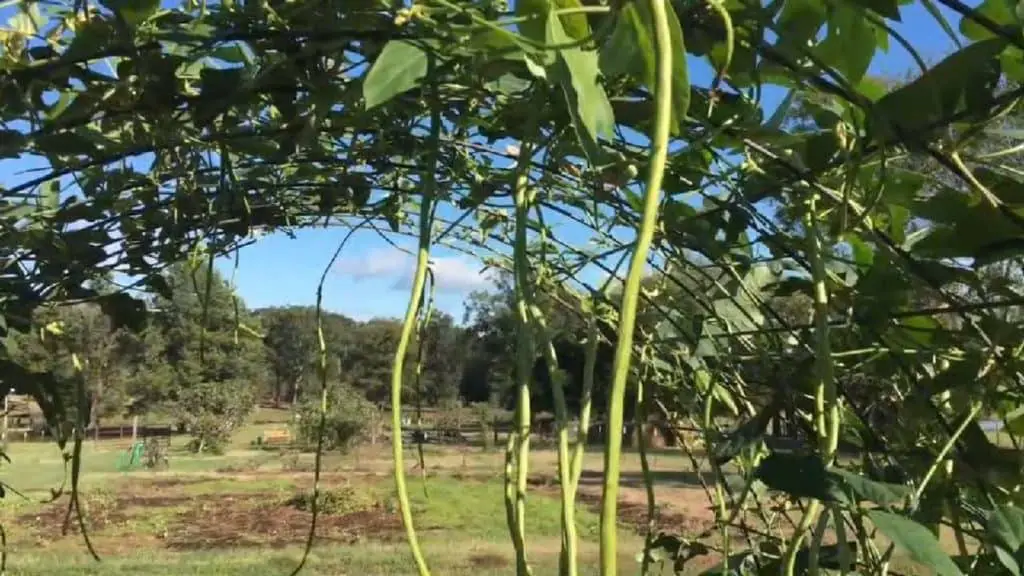
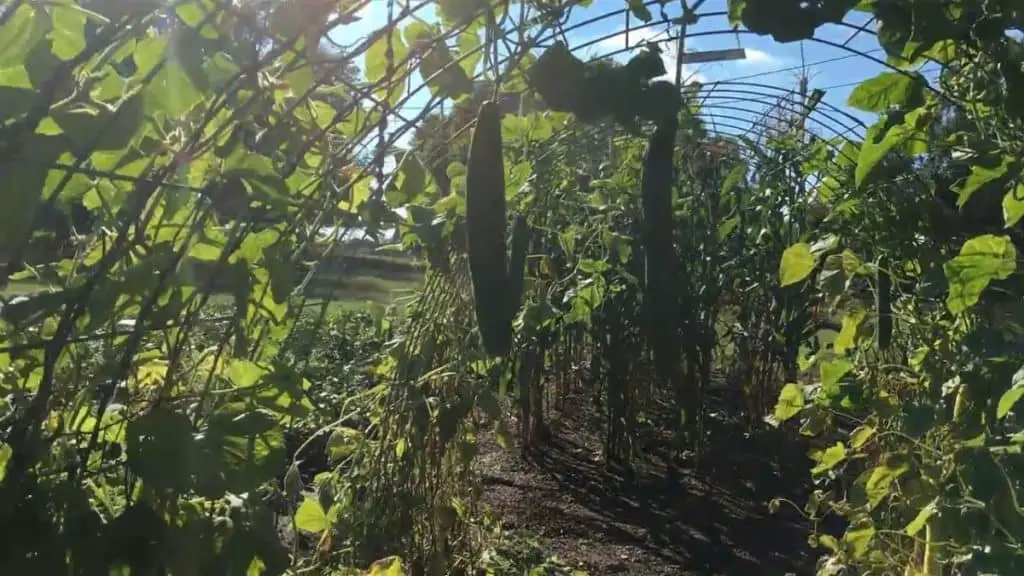
The Grow Arches are a beautiful addition to any garden and will allow you to grow a lot of food in a small space because it’s growing UP, not spreading OUT.
That’s the beauty of growing vertically. You’re not taking up a lot of real estate in your garden. And container gardening is great for growing vertically.
In fact, I’ve seen some beautiful grapevines on a Pergola. They simply had a container at each corner of the structure, and the grapevines climbed up and covered the Pergola. It was really nice. And considering the longevity of grapevines, it would be attractive, and productive for many years to come.
So yes, consider vining crops for containers. Tomatoes are considered a vining crop though some are shorter, patio varieties. They will also do well with a cage or some other trellis to attach to.
I have an extensive Playlist about Vertical Gardening With Grow Arches on My YouTube Channel. Check it out!
Other crops like pumpkins and watermelons love to “vine” too, but they are more “spreading” than they are “climbing”. And, the sheer weight of what they produce doesn’t make them conducive to climbing. However, you can still plant them in containers, but allowance will have to be made for them to spread out because they really want to run and cover a lot of ground.
Even as I write this, I have some pumpkin and watermelon vines in my garden that are sprawling out 15 to 20 feet. They do love to run. So if planting them in containers, a large pot could house the plant itself, but the vines would have to be allowed to run as far as 20 feet or so.
The Best Way To Fertilize A Container Garden
The answer to this question depends on whether or not you are trying to be organic. But really, even if you are organic some of the principals are the same.
Since the plants are confined, they could be susceptible to being burned by harsh fertilizers that are placed too close to the roots. For that reason, I would suggest water-soluble fertilizers.
Miracle Grow and Peters have great fertilizers that are mixed with water. Miracle Grow has an Organic Version but I’m not sure if Peters does or not. But there are many other Organic Choices out there.
The fact that they are water-soluble means that it’s really hard to “over-fertilize”, therefore it’s hard to burn the plants.
That being said, I’ve used traditional synthetic granular fertilizer in container gardening with a lot of success. I just had to be careful that I didn’t apply too much, and that I didn’t apply it to close to the plant itself.
So, using a granular fertilizer, whether organic or synthetic, is fine in a container garden. you just wouldn’t want to place the fertilizer too close to the roots of the plant.
What I like to do, and I do it in containers as well as in traditional gardening, is fertilize a small amount once a week. I place about a tablespoon of fertilizer 8 to 10 inches away from the plant, just underneath the surface of the soil.
Doing this once a week allows the plants to eat as regularly as I do (well, maybe not), and can result in great vegetable production. Keeping the fertilizer away from the base of the plant usually means it won’t get burned. If you use more than a tablespoon, and if it’s very strong fertilizer like 20-20-20, then it could still be harmful to the plant, so be careful.
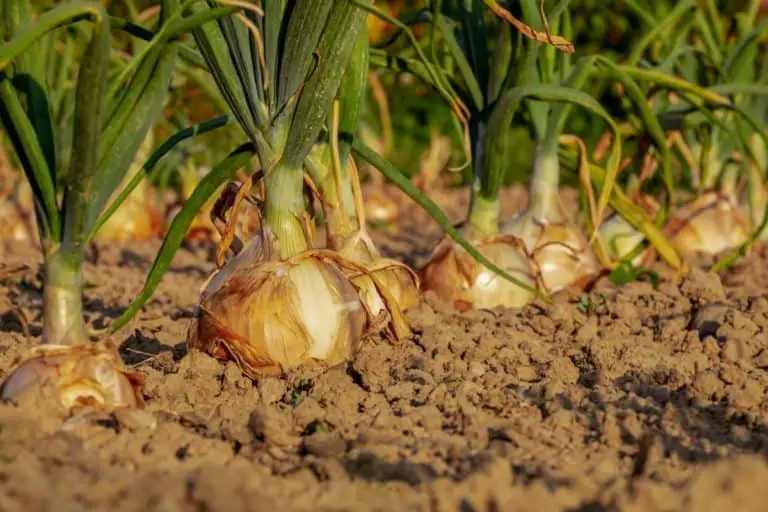
Of course, you could always just use composted manure. The largest and sweetest onions I’ve ever grown were covered with about an inch of composted manure. I didn’t use any other fertilizer other than that. And they got huge, and they were very sweet! But manure alone might not be enough for heavy feeding plants like tomatoes and corn. You will probably have to supplement with other kinds of fertilizers.
So, just continue to fertilize as you would in a traditional garden. But be aware that a container could possibly confine the fertilizer to a smaller area, and therefore possibly burn your plants. Just don’t overdo strong synthetic fertilizers.
Best Way To Water
Traditional containers will have to have a way for water to exit. That usually means drain holes in the bottom of the container. If there are no drain holes, and a hard rain comes, the container could fill with water, become a pool, and drown the things that are planted in it.
Most container gardens will be watered from above. They will either receive rainwater or have water delivered to them by the gardener. A hose with a gentle “wand” at the end of it would be best if you are going to hand water.
Add water when the first inch or so of the container’s soil is dry. That could be once every few days, or once a week, depending upon the rainfall you get, and the climate you are in. Obviously, in the hot dry south (in the summertime) you might have to water every day or two. It just depends on how hot and dry it is where you are.
I would highly recommend installing a drip irrigation system for your container garden. Yes, there it is something rewarding about hand-watering a garden. It just seems to connect you to the garden a little more so than if it were automated. But, a drip irrigation system (on a timer) saves you a lot of time and guesswork and allows you to even be away from the garden for a few days if need be.
I’m a big believer in drip irrigation. And I’m a big believer in Timers. A drip irrigation system could consist of simply a mainline running past your containers, with a small feeder line running up and into each container. It would have a drip emitter on the end of it, feeding a small amount of water directly to the plant(s). Check out my article on drip irrigation basics.
If you’ve never used drip irrigation, don’t be afraid of it. It is so simple, that anyone can do it. Literally anyone.
Weeds
Weeds become much less of an issue in a container garden. First of all, the potting mix that is used should be virtually free of any weed seeds. Even the manure and the compost should have very few if any viable seeds in them. During the composting process, any seeds that are present are usually killed due to the heat generated.
So any weeds that occur in your container garden should either be wind-blown or come in through bird droppings. Pulling the occasional weed in a container garden is much rarer than in a traditional garden.
Also, because the container is usually off the ground you are not having to bend all the way over to pull the few weeds that do occur. Depending on how high a container is off the ground, there may be no reason at all to have to bend or stoop-down to weed your garden.
This makes container gardening the preferred method for many elderly gardeners. The initial creation of the container garden (mixing the soil, setting the pots up, etc.) is offset by the ease of keeping the garden weed-free. Not to mention the fact that you don’t have to till or turn the soil to get it ready to plant.
Also, a layer of weed-block can be put on top of the container. This could make your container garden completely weed-free.
Portability!
If you are a Container Gardener, you now have the ability to move your garden anywhere you want it. Seriously, whether it’s a few feet, across your property, or across the country if you relocate, your garden containers can come too.
If you have vegetable varieties that will bolt in the hot sun, move them into the shade of a tree. That might extend their viability for weeks! Depending on how large your containers are, you might have to employ a dolly or some other means to move a heavy soil-laden container around, but you can if you want to. You DO have that option with a container garden.
This comes in handy if you have plants that aren’t hardy enough to survive your winter. Just move them inside a barn or even inside your house and, if they are perennial, they might be ready for next year. The alternative is starting over each and every year after a winter kill.
Above Ground Pests
Most above-ground pests like bugs and caterpillars originate in the soil. Even most flying insect pests are birthed in the soil. Then many of them find their way to the plant by crawling up the stem. In a container garden, this process is blocked somewhat, making pest problems less likely.
Even bird damage is easier to control. You can put bird netting over an individual container or two, much easier than over an entire row of plants in a traditional garden, thus thwarting bird damage on fruit and vegetables.
Below Ground Pests
The main reason to garden in containers, for me, is the problem I have with below-ground pests. At one time I had a small but thriving commercial Blackberry patch. Over the course of a few years gophers completely decimated that patch. I didn’t notice it at first, and I underestimated the damage that gophers could do.
Gophers primarily eat the roots of grasses and plants, and they absolutely feasted on my blackberries. I admit I did not grasp the seriousness of the problem until it was too late. And when I finally took care of the gophers (with much satisfaction) my blackberries were in a poor state of health, and they just never recovered. The root systems were just too damaged.
So, for me, containers are a way to make sure that never happens again, to my blackberries, vegetables or even fruit trees. I also have moles in my traditional gardens, but they are NOT a problem in my container garden. So container gardening virtually eliminates damage by gophers, moles, and voles… and all the underground, tunneling pests.
I hope this has helped you decide that Container Gardening is for you. At the very least, I hope you will experiment with it. If you do, I think you’ll find it as rewarding as I have. Happy gardening!
I have around 800 Videos on My YouTube Channel about Container Gardening, Vertical Gardening, Back To Eden Gardening and just about every other aspect of Homesteading Life. Check it out!