Propagating Blackberries From Cuttings – FREE PLANTS!
Blackberries are one of the most nutritious fruits you can grow, and one of the tastiest. Using these simple techniques, you’ll be able to propagate your own plants from cuttings quickly and easily. FREE PLANTS!
The propagation of blackberry plants can be done easily using cuttings from the parent plant. Using a rooting hormone and the correct potting medium, these cuttings will provide you with new, “cloned” plants in a short amount of time.
I’ve propagated dozens of fruiting plants including Grapes, Muscadines, Blackberries, Hardy Kiwi and others. Propagating from cuttings is by far the easiest and cheapest way to increase the number of fruiting plants in your garden. And it couldn’t be easier.
Rooted Cuttings
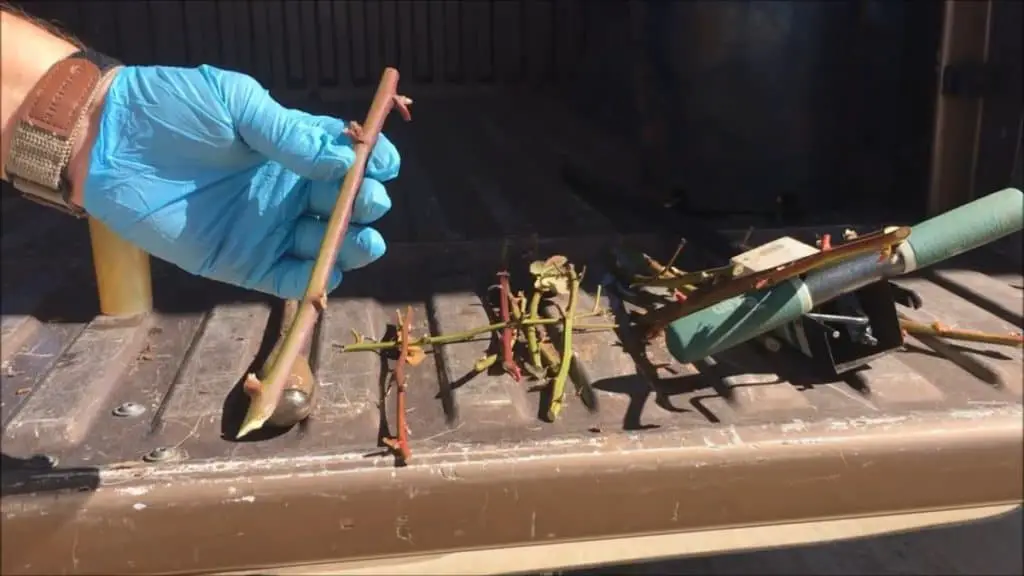
If you already have blackberry plants, or if you know someone who does, you will need to take some cuttings. I like to take cuttings that are about 3/8” in diameter. That’s about the diameter of a yellow No.2 pencil, or slightly larger. This size cutting has been the most successful size for me in propagation.
I like to use cuttings that are about 8” to 10” long.
When you take the cutting, make sure you know which way the plant was growing. I always cut the “bottom” of the cutting at an angle (see illustration below). This lets me know that this is the end that needs to be put in the pot for propagating. Sometimes it’s not easy to tell the top from the bottom after it’s cut and laying in a basket.
I recommend that you cut or mark the bottom end in a distinctive way that will remind you which of the two ends will be rooting, and which end will be sprouting the new growth.
The length of the cutting is not as important as the number of “nodes” there are on the cutting. A “node” is the little bump on the cutting that would sprout a new shoot out if it was still on a growing plant.
In this case, the lower nodes are the places that will sprout the roots. So, I always try to have at least two nodes that will be inserted in the potting mix. That helps ensure the cutting will be viable and start to root. If you only have one node on your cutting, you are reducing your chances for success by half. Try to make sure to have two nodes down in the mix to root.
After you’ve made your cuttings, you are ready to apply the “rooting hormone” to the lower nodes. These are the nodes that will be planted in the potting mix. The rooting hormone will help the rooting process begin.
There are a lot of folks that don’t use rooting hormone when they root cuttings, but I’ve had better success when I do. Do not apply the rooting hormone to the top nodes, just to the bottom nodes.
The rooting hormone I use is called Dip N Grow. It’s very inexpensive and I think you’ll find it will give you a better percentage of success. And isn’t that what we all want?

Also, it’s important that your cuttings be fresh. Don’t make all your cuttings, then decide to wait a day or two to do your propagation. They can not dry out. A dry cutting is a dead cutting. You might get away with wrapping them in wet newspaper and placing them in the refrigerator for a day or so, but I always just wait till I’m ready to do my propagation before I take my cuttings.
Make sure the “cuts” are clean too. Don’t break the cuttings off, or make the cuts with a dull pair of pruners. Make the cuts clean and precise.
Handling the cuttings
One of the most important things to consider when you are making your cuts and when you are preparing to root them is to protect the nodes on top of the cutting. The bottom nodes (the ones you’ll be putting into the potting mix) aren’t that prone to damage. In fact, in some cases, I will scarify (scrape them) to roughen them up somewhat.
But the upper cuttings, the ones that will sprout the new green growth, can be damaged. Take care to not damage the upper nodes with your fingers while you are handling the cutting, when you dip it into the rooting hormone, or when you are pushing it into the potting mix. Damaging those nodes might kill its chances of sprouting.
It’s All About The Hormones
As I said, I like to use the Dip N’ Grow rooting hormone. It is a liquid concentrate. Make sure you follow the directions on the box for softwood cuttings. Hardwood cuttings will be something like a branch from a fig, or some other fruit tree. If the cutting is taken when the tree is dormant, the wood will be “hard” and thus it’s called a hardwood cutting.
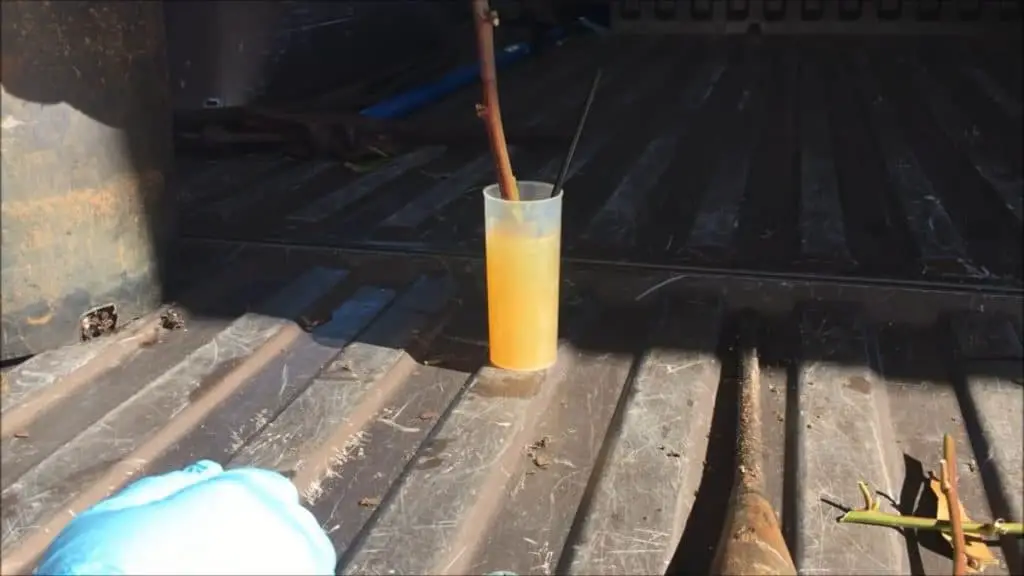
These blackberry cuttings are considered to be “softwood” cuttings. The directions on the rooting hormone will have you put a small amount into the enclosed tube. It will tell you how much, but it’s not a lot. That’s why I like the Dip N Grow. It’s concentrated and will last a long time. You can do a lot of cuttings with a small bottle of it.
When you have your diluted mixture of the rooting hormone, dip the “root-end” of the cutting in the liquid. This is the end of the cutting you will place into the potting mix. The directions will have you leave it in 5 seconds or so. When you pull it out, it has been treated with the rooting hormone and is ready to put in your propagation pot.
You really should wear gloves when you do this, per directions on the package. This is a “hormone” and caution should be exercised to make sure you don’t get it on your skin.
There are many different kinds of rooting hormones. Many are powdered. If you are using a powdered rooting hormone, you would dip the cutting into the powder, moving it around until it coats the lower part of the blackberry cutting, taking special care that the rooting “nodes” are well coated with the powder. Although I like Dip N Grow, I have used the powdered rooting hormones with success.
Planting Them In The Mix
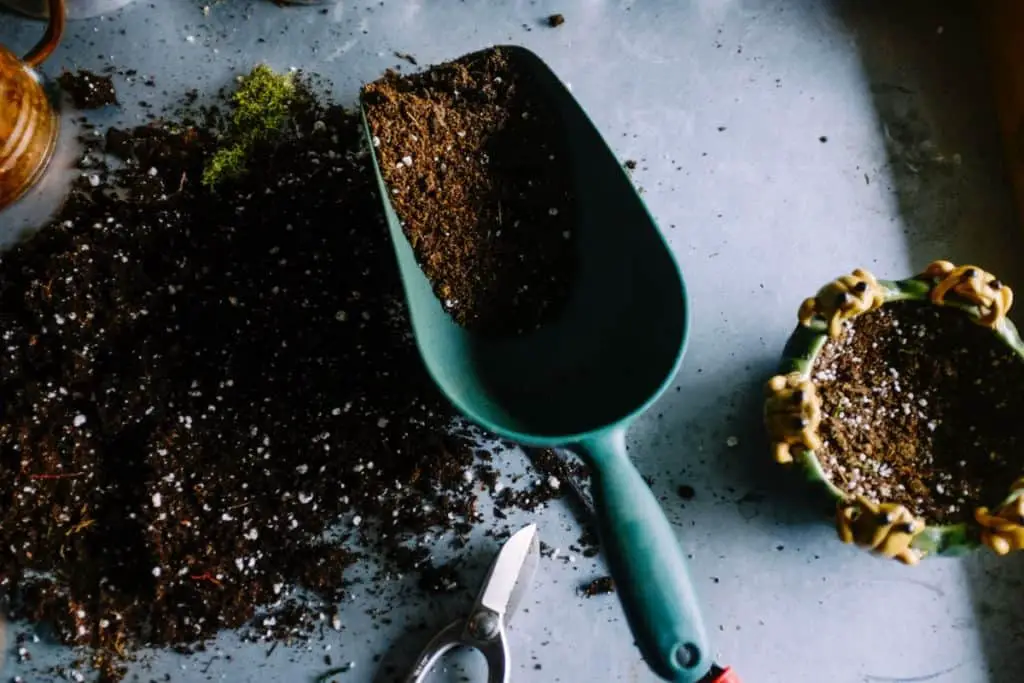
First of all, let me make some recommendations as to your propagation mix. I use a “potting mix”. Notice I did not say “potting soil”. A potting mix is loose and pliable. It is mostly peat moss with some vermiculite and perlite in it. Potting soil can get hard and won’t allow your cuttings to develop roots. Make sure you get a good potting MIX.
There are those that use sand to propagate. I’ve tried it and my success was so poor that I didn’t use it again, nor do I recommend it. I always use a mix.
Which mix is best? I would try to get a mix that doesn’t have a lot of sticks in it. A “seed starting mix” is usually very free of larger material and is just a finely sifted blend. Perfect for propagation.
Also, HOSS Tools has a very nice seed starting mix on their website. Take a look at the mix and the many other products they have. They are a family-owned company manufacturing many quality heirloom gardening tools.
I’ve used their seed starting mix, and have found it to be top-notch. In fact, I’ve found all their products to be the absolute best you can buy. Check out HOSS TOOLS here, or click the banner on the right.
Once you have your cuttings dipped (or powdered) it’s time to push them into the potting mix. The potting mix should be damp. Not soggy, but not dry either.
If you are using the powder, and you push the cutting down into the mix, you can easily rub the powdered rooting hormone off of the cutting. So, don’t just push the powder-coated cutting down into the potting mix.
First, make a hole for the powder-coated cutting. I use another stick or a Sharpie pen to make the hole. Then I push the cutting down into the hole, taking care not to wipe off the powdered rooting hormone. Then seal the mix around the cutting, making sure there are no air gaps between the potting mix and the cutting.
If you’re using Dip N Grow since it’s a liquid, the hormone has already soaked into the cutting and you won’t wipe it off by pushing it down into the pot. That’s another reason I like the Dip N Grow. It’s less complicated.
Potting Them Up
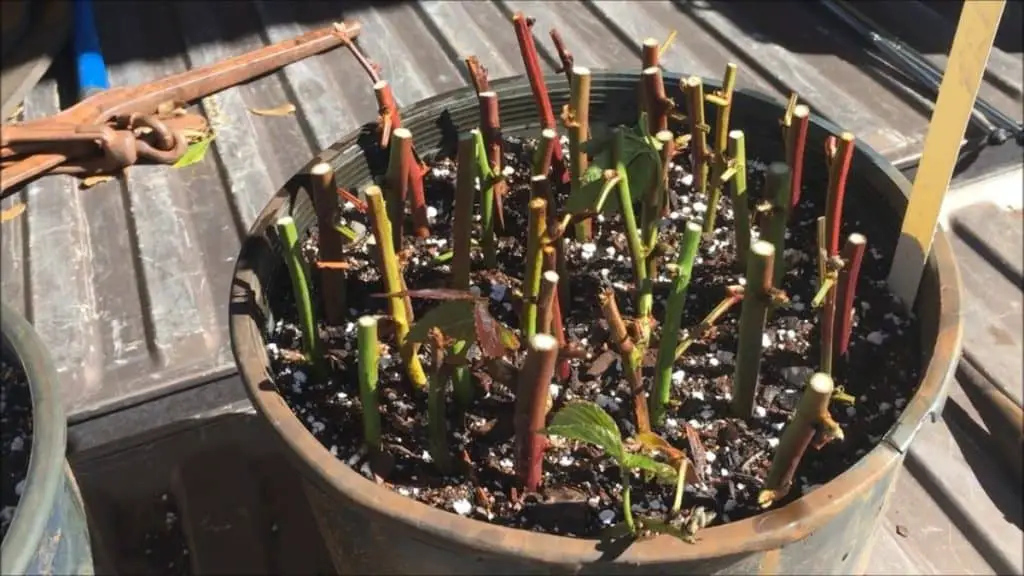
You’ll need to decide if you are going to pot them up in individual pots, or in a group. I usually pot them up in a group simply because it’s just easier. For a “group” propagation, I fill a pot with moist potting soil and put a few of the cuttings into it. This can be a coffee can or maybe a 5-gallon nursery pot that once held a tree. This is how to do it when I’m putting several cuttings in the same receptacle (the group, or bulk method).
If you are doing individual cups or pots, you’ll just repeat the process for each cutting, and not for a group of cuttings.
In the group or bulk method, when you are placing the cuttings into the pot filled with potting mix, you can place them fairly close together if you are doing the group method. I usually put a dozen or so into a coffee can. They are probably an inch or so apart (see the picture below).
Now you may think that’s way too close, but you will be separating them when they are well-rooted. And we’ll talk about that later.
If you would rather use individual cups or pots, you can put each cutting into its own cup. I’ve done it like that and it’s fine. I like to use a clear plastic cup, like a Solo cup, but clear. The reason I like clear is that I will be able to monitor the rooting process better.
If the cuttings are in a pot or cup that you can’t see through, you’ll only be guessing as to the progress of the root development. And, that’s fine. But I like to be able to see that the process is proceeding as it should.
The Most Important Step
Okay, so at this point, you have your cuttings in the potting mix. They have been coated with the rooting hormone of your choice, and you are ready to watch the magic of propagation happen.
But not so fast. Remember earlier I said that a dry cutting is a “dead cutting”. Well, that is true even more so now. Although they are in a moist potting mix, they are only in that mix about “knee-deep”. The tops of the cuttings are exposed to the air. Those tops will dry out quickly, and it is imperative that you do not let that happen.
You will have to set up some sort of misting system, or at the very least you will have to implement a conscientious misting schedule for these cuttings. They have to be misted, or they will dry out and die.
It is possible for you to mist them, or spritz them by hand if you can do it on a regular basis, and, if you are not prone to forgetfulness or leaving them unattended for days at a time. For most of us, this means if we are working, we are not misting regularly, but three or four times a day should suffice if it’s not too hot and dry.
How much misting they will need, for the most part, depends on what time of year it is, whether they’re indoors or outdoors, in sunlight or shade, and generally the humidity of the air surrounding them. Low humidity combined with a breeze will dry the cuttings out very quickly. Like a blow dryer.
There are some inexpensive Misting Kits on Amazon that will work for your cuttings. Again, if you are going to be away for any length of time, you will need to put this misting system on a timer. Pick one that can be set for a short mist cycle at least every hour. I have several Timers for use on my homestead.
I’m sure you figured out that the misting system will need to be used outside and not inside, right?
As to the time of year, I’m going to be honest, I have never had much success propagating cuttings in the summertime. But of course, I live in Texas. Texas gets hot in the summertime. And those cuttings just always seemed to dry out and therefore never became viable.
So, I recommend that you do these cuttings in the fall or winter. In fact, that’s the best time to take a cutting anyway. The plants are generally dormant or certainly have stopped any aggressive growth. That’s the best time to take a Blackberry cutting or any other cutting… When it’s dormant.
Now, having said that, please understand that blackberry’s never really (at least in East Texas) go into a state of true dormancy. Some of them will lose their leaves, some will not. Many will turn colors (like purple) but not necessarily drop off.
But, fall and winter is the best time to take a blackberry cutting. And it is also the best time to propagate which works out perfectly. If you are in the “Frozen North” you may have problems running a misting system outside in the winter. obviously, it is going to freeze up and not work correctly.
In that case, I would suggest keeping them close at hand so you can care for them. Put them in a basement or some other area that will not get down to freezing temperatures. And make sure you try your best to see to it that the tops don’t dry out, by making sure you have a misting process or regimen in place.
I know I’ve talked a lot about misting the cuttings, but this is really the most important part of it. The tops of the cuttings must be kept moist. Where I am it’s not too hard to do that in the winter. I can leave them outside and mist occasionally.
I don’t even worry much when freezing weather comes. They can handle some of it. I’m just not sure if they can handle the extreme cold that our northern neighbors endure.
Also, if you are propagating indoors, you might want to consider a heat mat to place under the pots. I have a good seedling starter heat mat, and use it a lot for starting seedlings, but I’ve seen others using a heat mat for rooting cuttings too.
I’m going to try that next time I do a batch of propagated cuttings. I’m told it helps the rooting process, so it’s worth a try for sure. Here’s the heat mat I have at Amazon (affiliate link). They have many different sizes, so pick one large enough to do the propagating (or seed starting) that you are planning.
While The Roots Are Forming
There’s really nothing to do while they are rooting except keeping them misted, which admittedly can be difficult unless automated with a misting kit and a timer.
The tendency for some is to pull the cutting up to see if there are any roots. That is a mistake. If it has roots, they are very small, almost hair-like roots, that can be damaged if the cutting is pulled up.
This is another reason to use a clear container for your propagation. A clear container, as I said before, will allow you to monitor the cutting’s rooting process. There will be no doubt if the cutting has “taken” if you see roots through the clear cup.
About the time you see roots, or soon afterward, you should see some growth from the top of the cutting. One or more of the nodes that are above ground (above the mix) will begin to start sending a shoot upwards looking for light.
Now the cutting needs light. If it’s outside, it’s fine and won’t need any supplemental lighting. If it’s inside, this would be a good time to take it outside. While it was rooting, it didn’t need a lot of light, but the green growth you are seeing now does need the light and will be stretching upward looking for it.
If there are freezing temperatures where you are it might not be a good idea to take them outside. In that case, you’ll need a supplemental lighting set up inside your house. There are some inexpensive Grow-Light Kits on Amazon for you to look at.
If you propagated the cuttings in individual clear cups or pots, you don’t really need to do anything now. Just monitor them to see if the green tops look healthy. Make sure they are getting enough light. If they are outside, they will probably get enough light, unless you are in an “Alaskan dark winter”.
After a few weeks, if they are in a “group” and not in individual pots, it’s about time to separate them and put them into individual pots. It’s easy to do and won’t harm the cutting if you are careful.
Don’t just pull them up out of the pot. The roots are still pretty fragile. Tip the pot over that has all the cuttings in it and let them spill out on a table. Then begin to gently separate the entangled roots from one another.
After that, you’ll want to immediately re-pot them into individual pots. Pick pots that are at least 1-gallon capacity. That will give them plenty of room to grow roots (and tops) until you are ready to plant them in your garden spot.
At this point, they don’t really need fertilizer, but if you wanted to, you could use a time-release fertilizer like Osmocote. It does a really good job of fertilization without the chance of burning the new plant. Many if not most nurseries use Osmocote.
Planting The Rooted Cutting
I know it’s going to be hard to wait till fall to plant them, but you really should. The rooted cutting really needs time to really develop its root system in their pots, before planting them in the garden.
If you go straight from the Solo cups to the garden there will probably not be enough roots formed, and you may lose your plant to the summer heat. After all the work you’ve done, you don’t want to lose those plants.
Please, have the patience to wait. Let the plant develop all summer, then plant it in the fall. You will need to make sure it stays watered and doesn’t get dried out. It should be pretty easy to look at the soil and determine when it needs water. But, don’t let it dry out.
Above ground containers dry out pretty quick, so watch them closely during the summer months to make sure the pots don’t dry out. They will be anxiously waiting to go to their permanent home, your garden.
When you plant them, dig a hole about twice the size of the pot they are in, and back-fill it with a mixture of your own native soil and potting mix or compost.
Then, mulch the plant with compost, with a layer of wood mulch or hay to help it retain the soil moisture through the winter and to help insulate it from the cold if you are in a northern climate.
In this article, I share a lot more detail on the planting and care of your blackberry plants.
I have around 800 videos on My YouTube Channel dealing with every aspect of raising blackberries and just about any other Homesteading related topic.